I’ve been really busy with other things this week, so I haven’t had much time to work on computing projects. So, I thought I’d write a more informational post including some tips and best practices for Home Assistant configuration. I’m also starting to think more about tidying up my own configuration, so some of these are todo list items for me!
Home Assistant is rapidly moving towards being less reliant on textual configuration, with more and more configuration being available via the GUI. However, Paulus has stated that the YAML configuration will remain an option. For the time being, there is still quite a bit that absolutely needs to be configured via YAML. These tips are mostly around organising your configuration well in order to manage it’s complexity as it grows. Let’s get into it…
1. Use the secrets.yaml file (for everything)
I’ve put this one first because I believe it’s the single most important thing you can do which will allow you to manage your configuration. For anyone that’s not familiar with this, the secrets.yaml file allows you to remove all the sensitive data from your configuration files and store it in a simple key value file:
my_super_secret: "hello123"
my_super_top_secret: "this is not really a secret"
When you want to use a secret in your config, just prefix the name with !secret:
password: !secret my_super_secretThis should be used wherever you have any marginally sensitive data. Things like passwords and API keys are a given. However, host names, IP addresses, names of family members, times/dates of events and locations should also be hidden.
Separating these secrets out from your main configuration allows you to more easily share you configuration without leaking personal data. It also allows you to back up to locations where the data may become public. Your home automation configuration is a very personal thing! You can leak significant information about the operation of your home and family members.
It seems to be a common misnomer that this makes your system somehow more secure. It doesn’t! There is no protection (such as encryption) applied to the secrets file on the disk of your HASS system. What this does do is help prevent accidental data leakage. It won’t protect your secrets in the case that someone breaks into your HASS server and gets access to your raw config files. However, in that case you already have major problems.
EXTRA TIP: You can also use secrets in ESPHome, using the same syntax.
2. Store your configuration in Git
This one follows directly on from the use of the secrets file and is really enabled by it. Once you have removed all the sensitive data from your configuration, it becomes really easy to share it.
One of the best ways to share your configuration is to create a Git repository of it and publish it online via GitHub or GitLab. This forms a handy offsite backup. You also get the benefit of being able to track the history of your configuration and easily revert changes if you need to. Git was designed for managing software and your HASS configuration is software.
This is something I actually need to get much better at. Although I’ve had my configuration published for some time, I tend to let it get out of date with the local changes I make. This negates a lot of the benefits and makes it a pain to update it in one big blob. If I kept it updated better this would be more incremental and easier.
I’m not going to go into a detailed run through of how to get your config into Git. The Home Assistant documentation has a wonderful page to get you started. I go even further and use git-crypt to encrypt my sensitive files, like secrets.yaml so that even they can be included (without anyone being able to read them).
3. Group related items with packages
There are several ways to structure your configuration. Lot’s of people start out using a single large configuration.yaml file. Later on you may decide that this is unwieldy and decide to split it up.
In this case your configuration gets split by what kind of configuration it is. For example, automations go in one file (or directory), sensors in another, scripts in another and so on. The problem is that you end up with related configuration being all over the place, scattered throughout different files or directories.
Packages aim to solve this problem, by allowing related configuration to live together regardless of type. This means that you can put the configuration for an integration and any logic relating to it together. For example, here is a snippet from my vacuum package, in which I have both the vacuum integration config and the automations relating to the vacuum:
neato:
  username: !secret neato_user
  password: !secret neato_password

automation:
  - alias: "Schedule vacuum Monday and Friday"
    trigger:
      - platform: time
        at: "09:10:00"
    condition:
      - condition: time
        weekday:
          - mon
          - fri
    action:
      - service: vacuum.neato_custom_cleaning
        data:
          entity_id: vacuum.marvin
          mode: 1
          category: 2
Shortly after starting with home assistant I started splitting up my configuration into directories based on configuration type. This served me well for a while, but over the last year or so I’ve been moving (slowly) towards using packages. Now all my new configuration goes into packages, but I still have a load of the older stuff to move over.
4. Use multiple triggers with and conditions
In my TV power saving automation from my last post I used multiple triggers with an and condition that checked the state of those triggers again. This is a generally useful pattern for anything where you want something to happen as soon as all relevant entities are in a given state.
For example, to run an automation when everyone goes out:
automation:
  - alias: Go to away mode
    trigger:
      - platform: state
        entity_id: device_tracker.person1
        to: "not_home"
      - platform: state
        entity_id: device_tracker.person2
        to: "not_home"
    condition:
      condition: and
      conditions:
        - condition: state
          entity_id: device_tracker.person1
          state: "not_home"
        - condition: state
          entity_id: device_tracker.person2
          state: "not_home"
    action:
      service: script.turn_on
      entity_id: script.away_mode
Of course, I could just use a group for that automaton. This pattern gets really useful where the states you want to check differ between entities – as in the TV example.
5. Use hass-cli for quick config checking and restart
When editing my config I prefer to use vim over SSH to the HASS server. I’ll usually also be using the Home Assistant GUI to debug and test things via the dev-tools. Switching pages in the UI every time I want to restart is a bit of a pain. This is especially annoying with the recent UI changes which put the config check and restart buttons underneath the (for me greyed out) settings for location, name, timezone, etc.
As such a quick way to check my config and restart is very useful. To this end I have this in my ~/.bashrc file on my Home Assistant server:
alias hass-restart="hass-cli service call homeassistant.check_config && hass-cli service call homeassistant.restart"This relies on having hass-cli installed. The command first calls the homeassistant.check_config service and then calls the homeassistant.restart service. It would be better if hass-cli could return 0 or 1 depending on the state of the configuration check and so not call the next step. However, it seems like HASS also checks the config before restarting. Having the the config check there is still useful to alert you to an invalid config.

With this in place, all I need to do is temporarily pause my vim session (with Ctrl-Z), type hass-restart and wait for it to restart.
6. Use the trigger object for more general automations
When an automation has multiple triggers it is possible to customise its behaviour based on what entity triggered it. This is done via the trigger object, which is passed into the actions of the automation for use in templates.
Here is an example from my battery notifications:
- alias: Critical Battery Notification
    trigger:
      - platform: numeric_state
        entity_id: sensor.kitchen_hall_door_battery
        below: 5
      - platform: numeric_state
        entity_id: sensor.kitchen_button_battery
        below: 5
        # more triggers here
    action:
      service: notify.notify
      data_template:
        title: "Critical Battery Alert"
        message: "Device '{{ trigger.to_state.name }}' has CRITICAL battery: {{ trigger.to_state.state }}%."
As you can see this automation is triggered on one of several entity state changes (I shortened the list for reproduction here). The resulting notification however is customised to the particular entity which trigger the automation at that time.
7. Use entity ID lists in complex template sensors
Home Assistant has automatic state tracking logic used for determining when to update the state of a template sensor or binary sensor. However some templates, particularly those containing for loops are too tricky for it to work out. The workaround to this is to specify the entity IDs to track manually via the entity_id list.

For example:
sensor:
  - platform: template
    sensors:
      active_switches:
        friendly_name: Active Switches
        entity_id:
          - switch.tv
          - switch.kettle
        value_template: >-
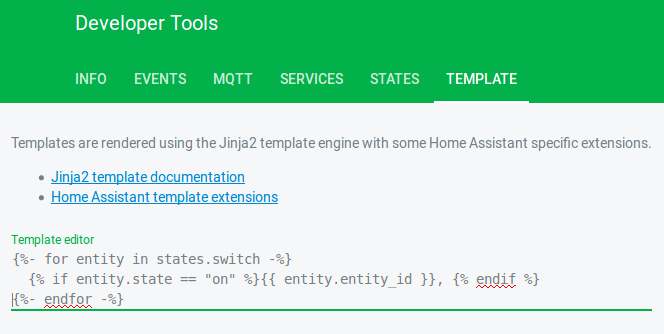
          {%- for entity in states.switch -%}
            {% if entity.state == "on" %}{{ entity.entity_id }}, {% endif %}
          {%- endfor -%}
I’m not sure why the sensor above would be useful (it’s a contrived example). I haven’t actually had the need to use a template like this so far, but it’s good to know how to make it work just in case I need it.
Conclusion
These are just seven items that I could think of, but I hope that you will find them useful. I’m sure there are probably many more tips and best practices for Home Assistant configuration. Feel free to share yours in the comments and other feedback channels. If I get enough suggestions I may do a crowdsourced follow up to this article!
Leave a Reply