If you ask the question “should I go for smart bulbs or smart switches?” on pretty much any home automation forum and you’ll undoubtedly get a mixture of answers. Most likely many of these will come down on the side of smart switches as the superior technical solution. This is generally because they replace the existing switch and so can be actuated manually. Also, you don’t have pesky switches that aren’t supposed to be touched, lest the smarts go out of your smart bulbs.
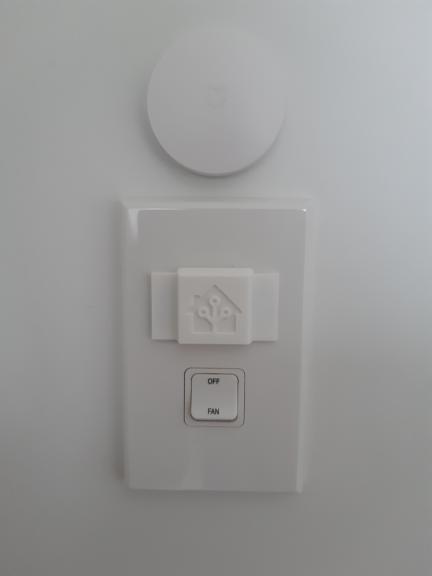
For a variety of reasons (pretty colours among them!), I only have smart bulbs in my house. I’ve written before about how I’ve added manual control back to some of these where required. Of course this still leaves me with certain switches in the house which “shall not be pressed”. I’ve had a nice non-invasive solution in mind for this for a while, but I’ve only been able to realise it since getting a 3D printer.
People Problems
I actually see this problem as less of a technical one and more of a people one. In the normal operation of our house, it rarely occurs that a smart bulb is turned off at the switch. This is because we are used to the way the house works and trust that the automation system will do the right thing.
Of course, when we have guests this all falls apart. People just can’t help flicking a switch if one is presented to them. Even if they just entered a room where the light came on automatically, they will switch it off on exiting. The only solution is to remove the temptation by removing or covering the switch.
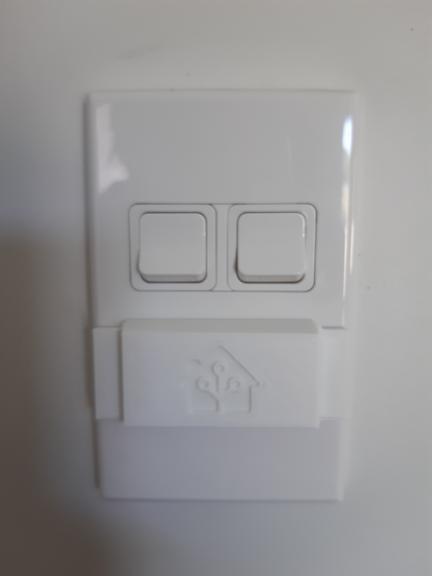
The low tech/ugly solution to this would have been a piece of tape with “do not switch off” scrawled on it in marker pen. However we can do better than that. There are little plastic widgets available which can be stuck over the top of a switch and will restrict its use. I haven’t seen any that will fit the switches here in NZ, which are more square in comparison with British or US switches. So I decided to make my own.
OpenSCAD to the Rescue
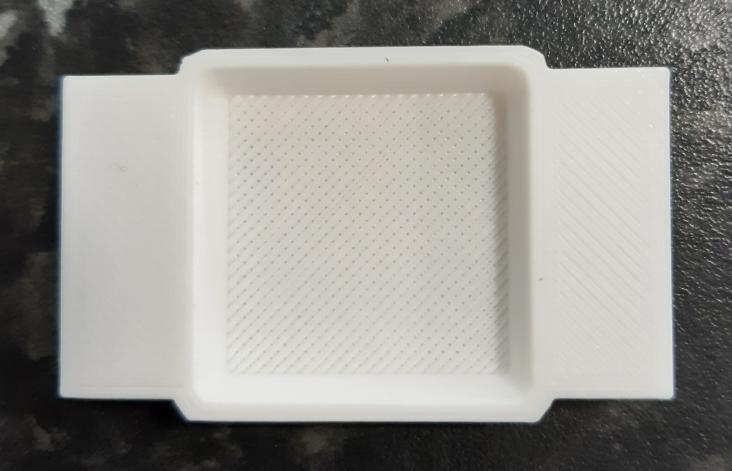
As a programmer, it’s probably not a surprise that my 3D modelling software of choice is OpenSCAD. I’ve dabbled in using is before and managed to learn the basics before getting my 3D printer. However, this is the first physical object I’ve actually attempted to produce with it. I’m actually really happy with the result.
Note: the first version of these had the logo flipped for some reason. I’ve since updated the files in GitLab and Thingiverse (links below). The photos below show the original versions with the reversed logo. Thanks to @templarian on Twitter for pointing this out.
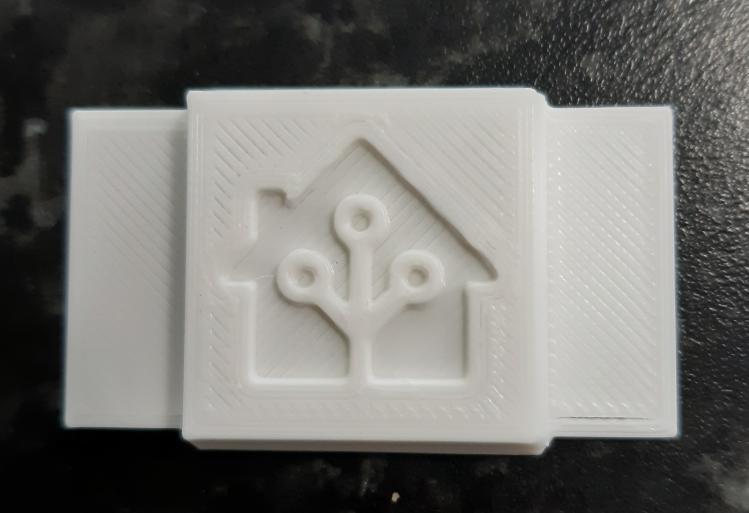
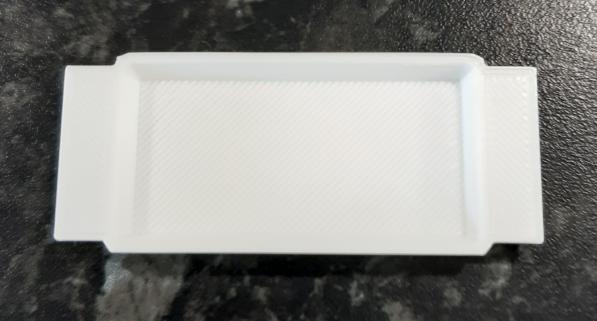
This has been made for my PDL-600 series switches, but the design is parametric, so should be trivially adaptable to other NZ/Australian switches, since most of these seem to maintain the squarish form factor. I’ve also made a double switch cover for two switches arranged horizontally. This was done by elongating one side and centring the logo.

Model Parameters
The model parameters are available at the top of the OpenSCAD source and have comments, which allows the software to present you will a nice dialog for editing the parameters. You can even set presets and switch between them. I’ve already included the presets for my single and double switches.
The available parameters are as follows:
wall_thickness– The thickness of the main wall around the switch. Defaults to 1mm and you probably won’t need to change it;button_length– The length of the cover (from top to bottom as you look at it mounted, since the reference is to the flat surface as it’s printed). Adjust depending on the size of your buttons;button_width– The horizontal width of the cover, to allow for non-square buttons and also multi-button arrangements. I doubled this to produce the double cover;button_height– The height of the button from the switch plate. Used to create the internal cavity to cover the switch;logo_x_offset– X coordinate offset of the logo. Use this to move it around if you change the cover dimensions above;logo_y_offset– Y coordinate offset of the logo. Use this to move it around if you change the cover dimensions above;tab_width– the width of the mounting tabs on either side;tab_height– the thickness of the mounting tabs.
Wait, I want some of these…
If you have a 3D printer you can download the OpenSCAD file and STLs (for the variations I’ve printed) on GitLab or Thingiverse. I’ve also included GCode files for the Ender-3 in the Git repo, but I recommend you slice the models yourself with your own settings. You’ll need to print with supports enabled for the internal cavity, but these pop out quite nicely.
If you don’t have a printer, you are welcome to use any of the available 3D printing services online, but I’m afraid I can’t recommend one. I also found them rather expensive when I looked into it.
If there is sufficient demand I might put up a Tindie or Etsy store for these and charge a couple of dollars (plus shipping of course!). Let me know in the comments if you’d be interested in this.
Conclusion
I’m really happy with these, especially considering they are my first custom 3D printed object. They’ve actually solved a real world problem for me, since we recently had guests again and nobody switched off any of the smart lights!
I’m interested to hear if anyone else has used 3D printing to solve smart home annoyances like this. There seems to be a lack of HA related designs on Thingiverse. Let me know if you’ve come up with anything useful!
Leave a Reply