I’m continuing to work through my backlog of completed but as yet undocumented Home Automation projects. As such you may be familiar with zigbee2mqtt already, since it’s been around for a while. However, I wanted to document my setup and show off a few automations for some specific use cases of mine.
Introduction
Two sensor projects have constantly eluded me in my ongoing efforts to transform my house into a DIY smarthome. The first of these are open/closed sensors for both internal and external doors and all the windows. The second are some input buttons allowing manual switching of devices in the cases where things aren’t automatically set correctly.
I’ve followed the various options over time and never quite managed to find anything I was happy with. I’ve even strongly considered building my own solution (as I’m doing with my room sensors). However, the trifecta of low power battery operation, nice compact physical design and being cheap enough to install everywhere stumped me. Then the Xiaomi Aqara/Mijia range of sensors started appearing. Those looked perfect, except for that horrible gateway. Enter zigbee2mqtt!
Zigbee2mqtt is a nodejs based software project that uses a cheap zigbee sniffer module with some custom firmware to replace the manufacturers gateways for a range of zigbee devices. As well as the Xiaomi devices it also supports Philips Hue and IKEA Tradfri devices among others. The software connects to the USB serial port provided by the dongle and sends messages via MQTT. It even comes with built in Home Assistant MQTT discovery support! (regular readers will know how much of a fan I am of that).
A Setup for Testing
To start playing around with these devices and not really knowing how well they were going to work in general and specifically with zigbee2mqtt, I decided to start with just a few devices. To this end, I ordered:
In addition, I needed the a CC-debugger programming tool and the associated cable in order to program the CC2531 dongle.
Installation and Setup
Once these arrived I was able to easily program the custom firmware to the CC2531 using the official instructions (I used the Linux version). After that I installed zigbee2mqtt again following the instructions. The only wrinkle in this process was getting the USB serial device to show up in the LXD container that runs my home automation components. This is reasonably specific to my environment of running in LXD, you wouldn’t encounter it on a bare Linux system.

After that I set about pairing my devices, again following the excellent documentation. I found that I had to have my devices very close (within 30cm) to the dongle during the pairing process. I’m not familiar with the specifics of the Zigbee pairing process. However, I’m assuming that it uses a very low transmit power. This would act as a security measure to prevent pairing with unauthorised devices. Once the devices were paired I was immediately able to see the door sensors as binary sensors in HASS.
I was able to complete this whole process in about an hour. It was really almost too easy. Huzzah for more than adequate documentation and things going according to plan (that almost never happens).
Reading Button Presses
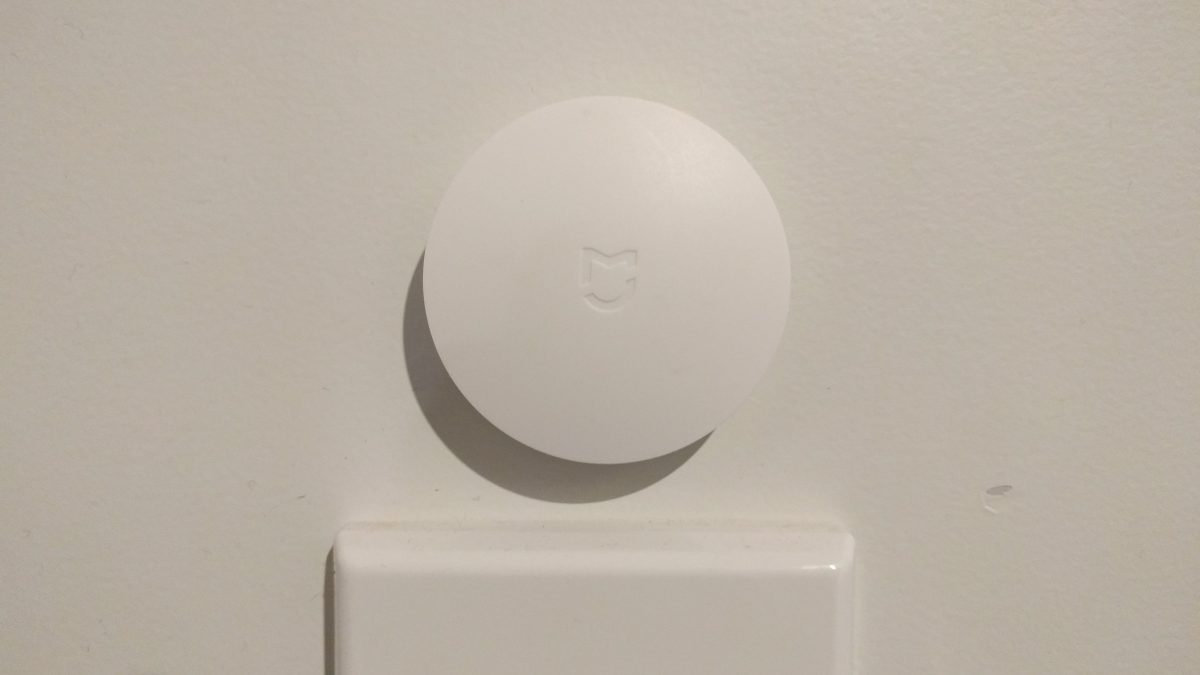
Integrating the buttons into Home Assistant is a little more difficult. This is because there is no built in abstraction for a button or control surface. Instead we fall back to catching the value published via MQTT when the button is pressed (actually, I note that there is a way to do this using an entity now, but that didn’t exist at the time I did it). Here is the set of automations for the button I put in my kitchen:
automation:
  - alias: Kitchen button downlights on
    trigger:
      platform: mqtt
      topic: 'zigbee2mqtt/kitchen_button'
    condition:
      condition: and
      conditions:
        - condition: template
          value_template: "{{ 'single' == trigger.payload_json.click }}"
        - condition: template
          value_template: "{{ states.light.kitchen_downlights.state == 'off' }}"
    action:
      service: script.turn_on
      data:
        entity_id: script.downlights_bright

  - alias: Kitchen button downlights off
    trigger:
      platform: mqtt
      topic: 'zigbee2mqtt/kitchen_button'
    condition:
      condition: and
      conditions:
        - condition: template
          value_template: "{{ 'single' == trigger.payload_json.click }}"
        - condition: template
          value_template: "{{ states.light.kitchen_downlights.state == 'on' }}"
    action:
      service: light.turn_off
      data:
        entity_id: light.kitchen_downlights

  - alias: Kitchen button dining room on
    trigger:
      platform: mqtt
      topic: 'zigbee2mqtt/kitchen_button'
    condition:
      condition: and
      conditions:
        - condition: template
          value_template: "{{ 'double' == trigger.payload_json.click }}"
        - condition: template
          value_template: "{{ states.light.dining_room_spots.state == 'off' }}"
    action:
      service: scene.turn_on
      entity_id: scene.dining_spots_bright

  - alias: Kitchen button dining room off
    trigger:
      platform: mqtt
      topic: 'zigbee2mqtt/kitchen_button'
    condition:
      condition: and
      conditions:
        - condition: template
          value_template: "{{ 'double' == trigger.payload_json.click }}"
        - condition: template
          value_template: "{{ states.light.dining_room_spots.state == 'on' }}"
    action:
      service: light.turn_off
      data:
        entity_id: light.dining_room_spots

  - alias: Kitchen button all lights on
    trigger:
      platform: mqtt
      topic: 'zigbee2mqtt/kitchen_button'
    condition:
      condition: and
      conditions:
        - condition: template
          value_template: "{{ 'long' == trigger.payload_json.click }}"
        - condition: or
          conditions:
            - condition: template
              value_template: "{{ states.light.kitchen_downlights.state == 'off' }}"
            - condition: template
              value_template: "{{ states.light.dining_room_spots.state == 'off' }}"
            - condition: template
              value_template: "{{ states.light.living_room_spots.state == 'off' }}"
    action:
      service: scene.turn_on
      entity_id: scene.main_lights

  - alias: Kitchen button all lights off
    trigger:
      platform: mqtt
      topic: 'zigbee2mqtt/kitchen_button'
    condition:
      condition: and
      conditions:
        - condition: template
          value_template: "{{ 'long' == trigger.payload_json.click }}"
        - condition: template
          value_template: "{{ states.light.kitchen_downlights.state == 'on' }}"
        - condition: template
          value_template: "{{ states.light.dining_room_spots.state == 'on' }}"
        - condition: template
          value_template: "{{ states.light.living_room_spots.state == 'on' }}"
    action:
      - service: light.turn_off
        entity_id: light.kitchen_downlights
      - service: light.turn_off
        entity_id: light.dining_room_spots
      - service: light.turn_off
        entity_id: light.living_room_spots

  - alias: Kitchen button candlelight dinner
    trigger:
      platform: mqtt
      topic: 'zigbee2mqtt/kitchen_button'
    condition:
      condition: and
      conditions:
        - condition: template
          value_template: "{{ 'triple' == trigger.payload_json.click }}"
    action:
      - service: light.turn_on
        data:
          entity_id: light.dining_room_spots
          brightness_pct: 1
      - service: light.turn_off
        entity_id: light.kitchen_downlights
      - service: light.turn_off
        entity_id: light.living_room_spots
Phew, that was ALOT of YAML! Each of these automations is basically the same, with a trigger on the relevant topic from MQTT. There then follows some conditions. The most important of these uses a template to unpack the click field of the JSON payload and check it against the type we are interested in. In this way we can do different things depending on the click type (e.g. single, double and triple clicks or long presses).
The other conditions in the automations perform some state checking to make sure that the action performed is correct depending on the current state of the house. For example there is no point turning the kitchen downlights on when they are already on. Instead the user clearly wants to turn them off. I spent quite some time tweaking these conditions over a few days of usage to get them just right. The final (and easiest) part of each automation is just performing the required action (or actions).
Button Functionality
With all this in place we end up with a single button which has the following functionality:
- On a single click turn on or off the kitchen downlights, depending on their state at the time
- For a double click turn on or off the dining room spotlights, again depending on their state
- On a long click turn on or off all lights in our main living space, again depending on their state
- A triple press turns off all the lights except the dining room which get dimmed (our romantic dinner scene)
That doesn’t even exhaust the capabilities of this switch. It can do quadruple (and maybe quintuple?) presses as well as variable length long presses. At some point the usability just starts to get silly though.
I have the other button set up to do something similar. However it’s on;y switching two things so it’s a little less interesting than the example above.
Monitoring Battery Status
Since these are battery powered devices, it’s useful to be able to monitor the battery level. In doing so we can avoid the otherwise inevitable situation of a significant other pressing the button and the lights not coming on. Luckily, zigbee2mqtt has us covered in this respect. For my buttons and sensors I added the following sensors for my battery levels:
sensor:
  - platform: mqtt
    name: "Kitchen/Hall Door Battery"
    state_topic: "zigbee2mqtt/kitchen_hall_door"
    unit_of_measurement: '%'
    value_template: "{{ value_json.battery }}"
  - platform: template
    sensors:
      kitchen_button_battery:
        friendly_name: "Kitchen Button Battery"
        unit_of_measurement: "%"
        value_template: "{{ states.sensor.kitchen_button.attributes.battery }}"
Here I’m just showing two sensors, one for the battery level of the door sensor and one for the battery level of the button. I obviously have similar configuration entries for the other devices.
For some reason the configuration required is a little inconsistent here. I found this was because the button has an entity created via MQTT discovery, which includes the battery level as an attribute, whilst the battery level is not included in the attributes for the door sensor entity.
This means that we create a raw MQTT sensor for the door sensor battery level and extract the reading out in the value_template. For the button battery sensor, we use a template sensor and just pull the required attribute out.
Battery Notifications
Of course, just having the battery levels as entities in Home Assistant is of limited use. What we really want it a notification when the battery gets low:
automation:
  - alias: Low Battery Notification
    trigger:
      - platform: numeric_state
        entity_id: sensor.kitchenhall_door_battery
        below: 20
      - platform: numeric_state
        entity_id: sensor.kitchen_button_battery
        below: 20
    action:
      service: notify.notify
      data_template:
        title: "Low Battery Alert"
        message: "Device '{{ trigger.to_state.name }}' has LOW battery: {{ trigger.to_state.state }}%."
Here we are triggering when any of the battery sensors we are interested in get below 20%. We then send the notification via the default notification service, using the trigger template variable to include the name of the sensor that triggered the alert and the state.
I actually have two such rules in my set up. This one at 20% and another critical warning at 5%. In this way I get an early heads up of a low battery in order to check I have replacement batteries ready. I then get another when the battery actually needs changing.
Quick Bonus Automation
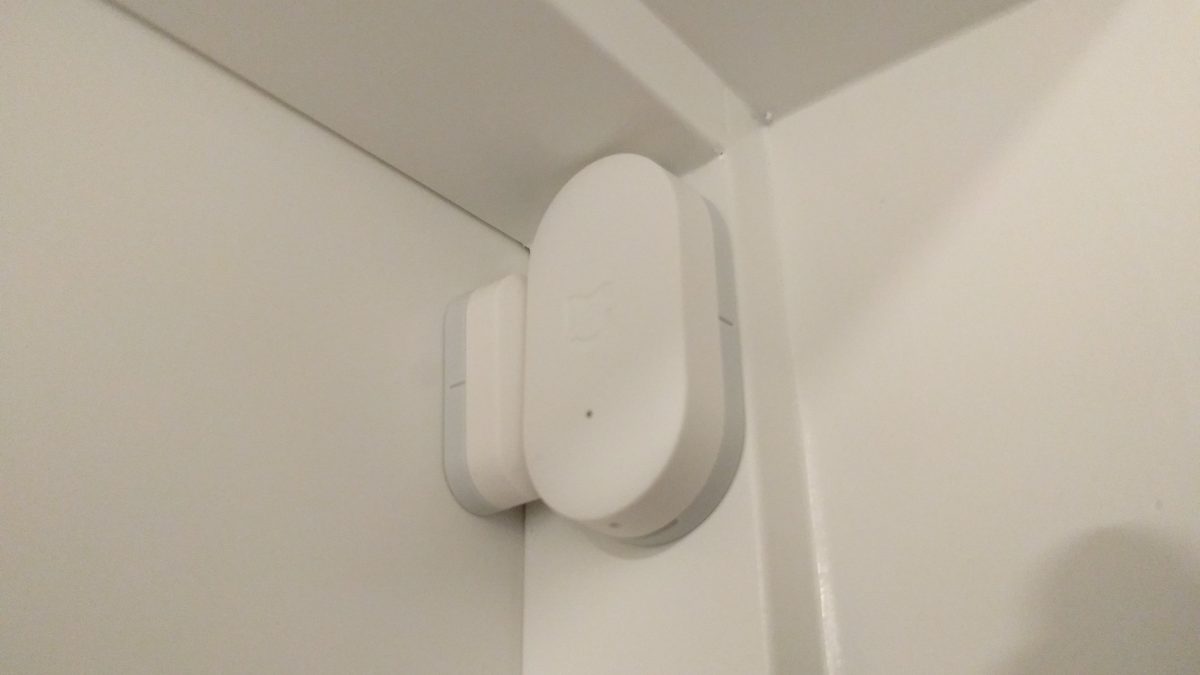
As I haven’t said much about the actual door sensors in this post, here are the automations I use to turn on and off a dimmed downlight in the kitchen if the door opens at night:
automation:
  - alias: "Night mode kitchen light on"
    trigger:
      - platform: state
        entity_id: binary_sensor.kitchen_hall_door
        from: "off"
        to: "on"
    condition:
      - condition: state
        entity_id: input_select.home_mode
        state: "Night"
    action:
      - alias: Lights to Goodnight Scene
        service: scene.turn_on
        data:
          entity_id: scene.goodnight

  - alias: "Night mode kitchen light off"
    trigger:
      - platform: state
        entity_id: binary_sensor.kitchen_hall_door
        from: "on"
        to: "off"
        for:
          seconds: 30
    condition:
      - condition: state
        entity_id: input_select.home_mode
        state: "Night"
    action:
      - alias: Light Off
        service: light.turn_off
        entity_id: light.kitchen_downlight_1
These are pretty self explanatory so I won’t go into them further. The interesting thing here is that the combined reaction time of the sensors, HASS server and smart bulb is so quick that the light is always on by the time the door is open enough to see the bulb. More than once this has tricked me into thinking that the off automation is not actually working and that the light is staying on all night. I found myself waiting outside the door a few times for the light to go off, until I had built up confidence that it was working as expected.
Impressions of the System
I’m really happy with both the software and hardware components of this project. Aside from the inevitable tweaking of the automation rules I had all four devices that I ordered working in an evening. This included flashing the dongle, installing zigbee2mqtt and all the HASS configuration and automations. Zigbee2mqtt seems to be a pretty well put together piece of software with excellent documentation. I’ve also had no stability issues from it in the several months it’s been running.
In terms of the sensors themselves, they are physically quite nice and well designed. Although they are made of plastic, the matte finish on the outside makes them feel more expensive than they are. They are also paintable, if you are so inclined. The adhesive tape used to stick the devices to the wall is also incredibly strong. You really have to make sure you get them in the right place before you push down!
Conclusion
Overall, I can recommend both zigbee2mqtt and these specific devices for anyone wanting to introduce zigbee devices to their home automation system. The barrier to entry both in terms of cost and set up time/complexity is low if you already have a bit of Linux and Home Assistant knowledge. For example, if you’ve been running a HASS server for a little while and have tacked a few other integration projects you should have no problem. At this stage I wouldn’t recommend it for absolute newcomers due to the firmware flashing part.
For my part, I will definitely be buying more of the window/door sensors with the aim of fitting out the whole house eventually. I’ll probably also get a couple more buttons too! In addition I’ll be investigating the ever growing list of zigbee2mqtt supported devices to see what else I can add to my system over time.
Leave a Reply