One of the projects I really wanted to do when moving into our new house was build a multi-room audio system. Traditional multi-room audio systems, such as Sonos, cost a massive amount for the functionality they provide. It looks like a cheaper alternative is now available using Chromecasts, but you are still at the mercy of what the manufacturer wants to do (like discontinuing the Chromecast Audio).
In this post I’m going to detail my multi-room audio setup, which plays perfectly synced audio across three sets of speakers, both indoors and outdoors. This system is 100% DIY and uses Free Software throughout. It’s also cheaper than even a single Sonos speaker.
System Overview
My system is comprised of a central server running Mopidy and Snapcast (the snapserver portion) and three audio players, each running the Snapcast client (snapclient).
Two of the clients are resident on the Raspberry Pi systems we use for Kodi on our TVs. One of these is located in the Living Room and connects into our soundbar. The other is located in the master bedroom and currently just uses the TV speakers.
The third client is located on a Raspberry Pi in our loft space, which is connected via an amplifier to speakers mounted outdoors by our patio.
The parts list for this setup is as follows:
- 1x Lepai LP-808 Mini Car Amplifier (alternative Amazon Link) – I also needed a 12v power supply (2-3A), which I picked up from my local electronics store
- 2x Hagibis USB External Sound Card (alternative Amazon Link)
- 2x 3.5mm Audio Cable (alternative Amazon Link)
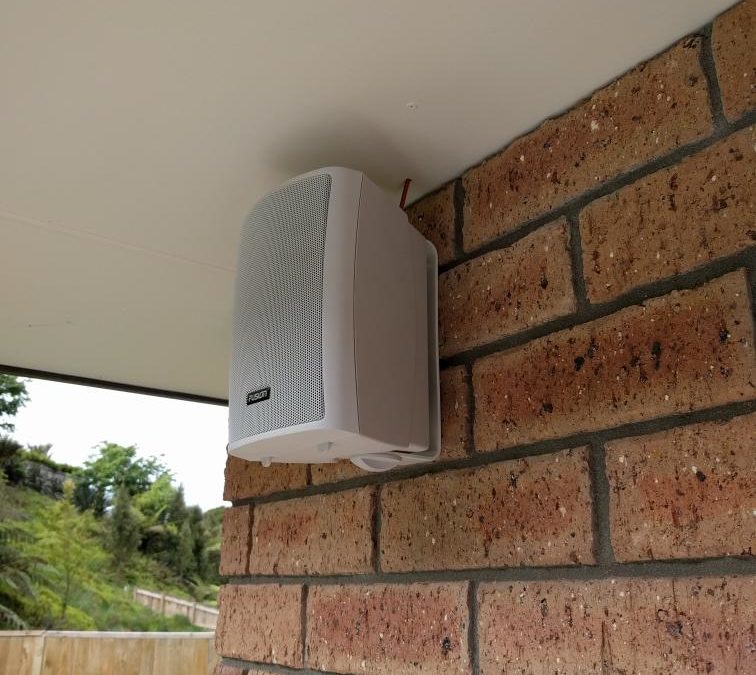
- 1x Fusion MS-OS420 outdoor speakers (pair)
- 1x Single Channel Relay Module (alternative Amazon Link) – I drove this with a transistor circuit which I didn’t document, this is left as an exercise to the reader.
- A motley assortment of Raspberry Pis (I used one old Pi 1B, a Pi 3B and a Pi 3B+).
The Fusion speakers listed above are outdoor/marine rated and certainly seem fine in the New Zealand climate (warm humid summers, wet cool winters). They are definitely not the best speakers in the world (the price reflects that). However, the quality is sufficient for my application of background/work music in an outdoor environment.
Overall, the total cost for the components ordered for this project was less than NZ$250. This comes in at less than the price of a single Sonos speaker. I’ve not included the Raspberry Pis in this, since I already had them and only one was specifically installed for this project.
Software Setup
The software setup is a pretty standard for this kind of project – basically just Mopidy feeding audio to Snapcast. As such I’m not going to give a full installation guide, since there are plenty of resources available. Take a look at the links below for full instructions (these are the resources I used when setting this up):
- Multi-room audio with Snapcast, Mopidy, and Home Assistant – Home Assistant Blog
- Wireless Multi-Room Audio System For Home – skalavala’s awesome setup
- Official Snapcast Wiki instructions for Mopidy
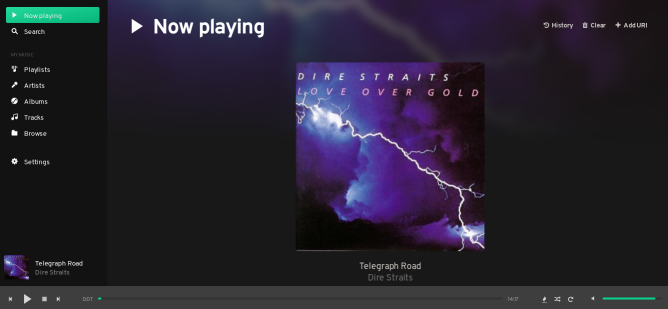
In terms of client/remote control software, I’m using Iris as a web interface for Mopidy. On the Android side I’m using M.A.L.P. as well as the Snapcast app. M.A.L.P. seems to be a reasonable MPD client and supports multiple servers, which may come in useful in future. The main issue I have with it is that it gets the album art wrong frequently and there seems to be no way to override it’s choices (or use the correct album art from the server).
Of course, I also have both Mopidy and Snapcast integrated with Home Assistant!
Outdoor Speaker Hardware Setup
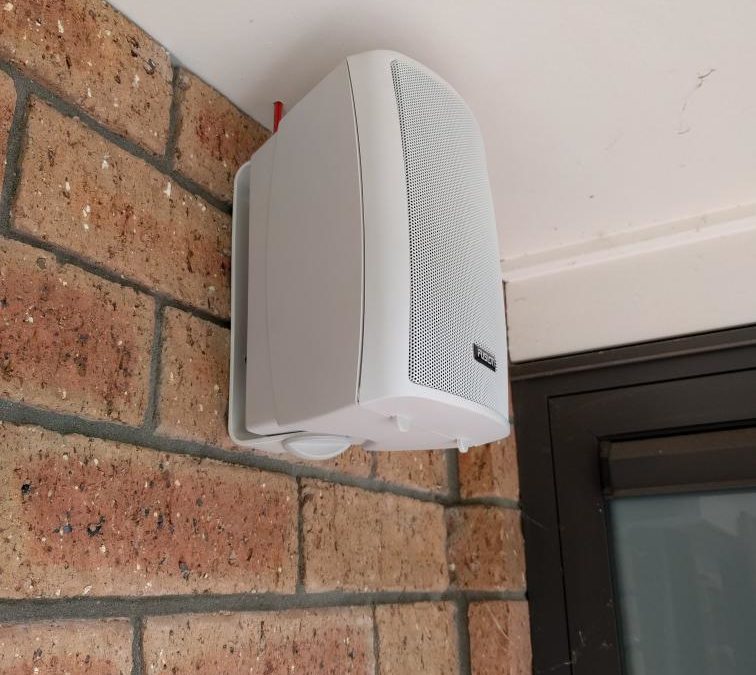
So far, so easy. Here is where I ran into issues. I mounted the speakers to the brick wall of our house just fine, but ran into problems running the cables up through the roof space to the amplifier. This was mainly due to one speaker being on the corner of the house where the roof is low. In this corner the steel supports for the roof were too close together for me to squeeze through. Also the level of the soffit where the cable came in was lower than ceiling height, so that the soffit forms a well around the outside of the house. All this made it nearly impossible to grab the cable.
I fashioned a makeshift tool from an old mop handle and reacher grabber with a line attached to the handle so that I could actuate it from the end of the pole. I even went as far as installing the Android IP Webcam app on an old phone and mounting that on the far end. With this I could then view the image on my phone and use the light on the camera end to see better. This helped, until the battery on the phone died! Eventually I managed to grab the cable by pushing the whole length of it up through the soffit. The resulting bundle was much easier to grab.
Phew, now we’re getting somewhere…
Overall, getting the speakers installed took most of a day, with several hours spent laying on my front in the (hot) loft space trying to grab the cable. The provided speaker cables also had to be lengthened with some extra speaker cable from my local DIY store. Luckily I knew this before I installed them and didn’t have to pull them back.
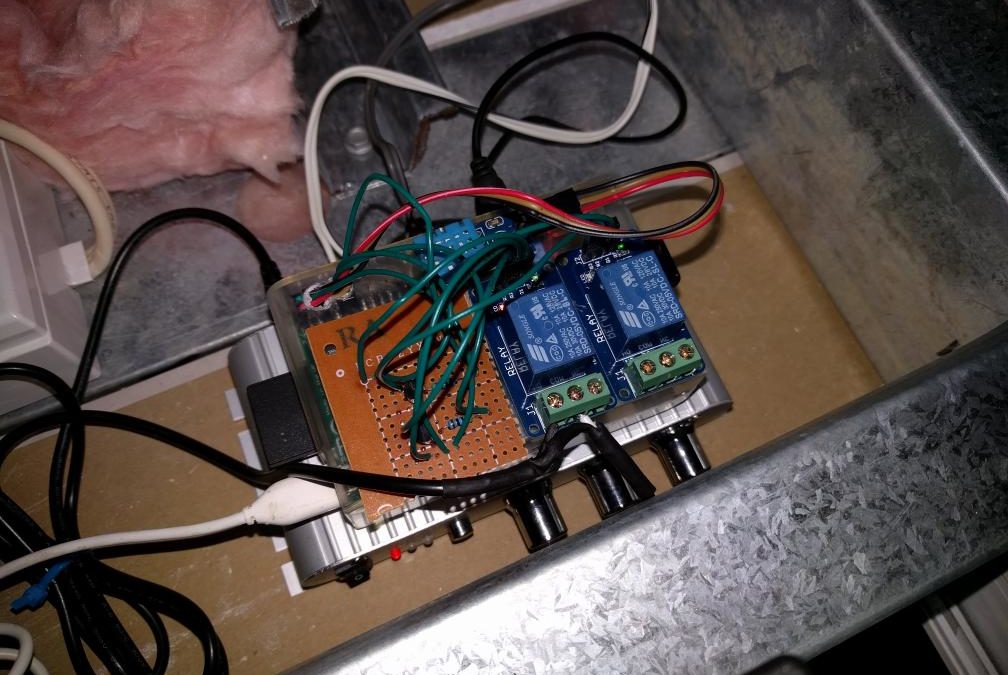
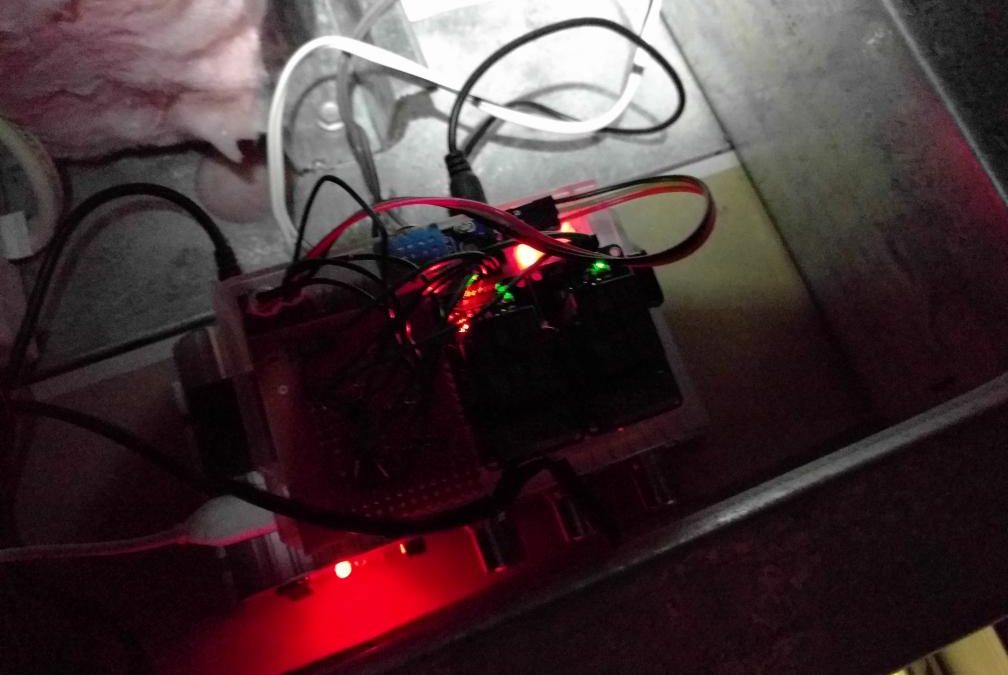
The remainder of the install was pretty much plug and play. I connected one of the USB soundcards to the Raspberry Pi and connected it’s output via audio cable to the amplifier. I spliced the relay into the 12V power line from the power supply to the amplifier to allow me to remotely control it’s power. Both the RPi and the amp are powered from the mains sockets I previously had installed in the loft.
Node-RED Relay Control

As with the relay power control for my room sensors, I used Node-RED to turn the relay on and off via MQTT. The flow uses my Home Assistant MQTT Discovery approach to be automatically added to HASS. There’s not much to say about this since it’s pretty much identical to the setup for the room sensors. Here’s the flow:
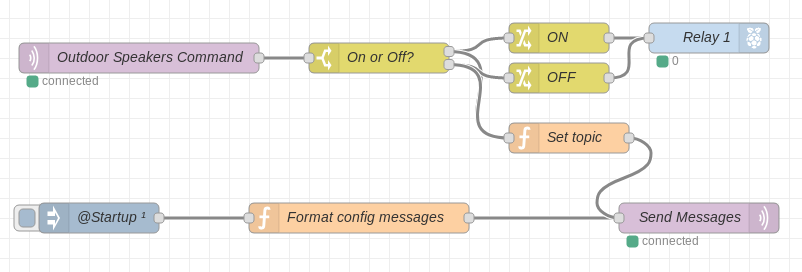
And here’s the corresponding JSON:
[{"id":"cd2cc1ba.21df68","type":"rpi-gpio out","z":"47863444.0972b4","name":"Relay 1","pin":"11","set":true,"level":"0","freq":"","out":"out","x":740,"y":60,"wires":[]},{"id":"b3084312.29b44","type":"mqtt in","z":"47863444.0972b4","name":"Outdoor Speakers Command","topic":"homeassistant/switch/outdoor_speakers/cmd","qos":"2","broker":"65d3656f.217c14","x":170,"y":80,"wires":[["72ed2721.9aa348"]]},{"id":"72ed2721.9aa348","type":"switch","z":"47863444.0972b4","name":"On or Off?","property":"payload","propertyType":"msg","rules":[{"t":"eq","v":"ON","vt":"str"},{"t":"eq","v":"OFF","vt":"str"}],"checkall":"false","repair":false,"outputs":2,"x":410,"y":80,"wires":[["36e87336.07603c","545168e2.b9a558"],["32dd96e5.5737fa","545168e2.b9a558"]]},{"id":"36e87336.07603c","type":"change","z":"47863444.0972b4","name":"ON","rules":[{"t":"set","p":"payload","pt":"msg","to":"1","tot":"str"}],"action":"","property":"","from":"","to":"","reg":false,"x":590,"y":60,"wires":[["cd2cc1ba.21df68"]]},{"id":"32dd96e5.5737fa","type":"change","z":"47863444.0972b4","name":"OFF","rules":[{"t":"set","p":"payload","pt":"msg","to":"0","tot":"str"}],"action":"","property":"","from":"","to":"","reg":false,"x":590,"y":100,"wires":[["cd2cc1ba.21df68"]]},{"id":"636d5fdd.480fc8","type":"mqtt out","z":"47863444.0972b4","name":"Send Messages","topic":"","qos":"2","retain":"true","broker":"65d3656f.217c14","x":730,"y":240,"wires":[]},{"id":"946d297a.c325","type":"function","z":"47863444.0972b4","name":"Format config messages","func":"var config = {\n payload: {\n name: \"Outdoor Speakers\",\n command_topic: \"homeassistant/switch/outdoor_speakers/cmd\",\n },\n topic: \"homeassistant/switch/outdoor_speakers/config\"\n};\nreturn config;","outputs":1,"noerr":0,"x":390,"y":240,"wires":[["636d5fdd.480fc8"]]},{"id":"1f888f96.a08ec","type":"inject","z":"47863444.0972b4","name":"@Startup","topic":"","payload":"","payloadType":"date","repeat":"","crontab":"","once":true,"onceDelay":"3","x":130,"y":240,"wires":[["946d297a.c325"]]},{"id":"545168e2.b9a558","type":"function","z":"47863444.0972b4","name":"Set topic","func":"msg.topic = \"homeassistant/switch/outdoor_speakers/state\";\nreturn msg;","outputs":1,"noerr":0,"x":600,"y":160,"wires":[["636d5fdd.480fc8"]]},{"id":"65d3656f.217c14","type":"mqtt-broker","z":"","name":"MQTT Broker","broker":"mqtt.example.com","port":"1883","clientid":"","usetls":false,"compatmode":true,"keepalive":"60","cleansession":true,"birthTopic":"nodered/loft/status","birthQos":"2","birthRetain":"true","birthPayload":"online","closeTopic":"nodered/loft/status","closeQos":"2","closeRetain":"true","closePayload":"offline","willTopic":"nodered/loft/status","willQos":"2","willRetain":"true","willPayload":"offline"}]I also have a couple of automations which I use to mute/unmute the relevant Snapclient when the speakers are turned off. My completely unfounded hypothesis is that Snapcast should be intelligent enough to not send any data to muted clients, which should reduce unnecessary traffic on the network. I’ve not done any investigation to verify this however. In any case, here are the automations:
automation:
  - alias: "Mute outdoor speakers when powered down"
    trigger:
      platform: state
      entity_id: switch.outdoor_speakers
      from: "on"
      to: "off"
    action:
      service: media_player.volume_mute
      data:
        entity_id: media_player.snapcast_client_outdoor_speakers
        is_volume_muted: true

  - alias: "Unmute outdoor speakers when powered up"
    trigger:
      platform: state
      entity_id: switch.outdoor_speakers
      from: "off"
      to: "on"
    action:
      service: media_player.volume_mute
      data:
        entity_id: media_player.snapcast_client_outdoor_speakers
        is_volume_muted: false
Indoor Setup with Libreelec and Kodi
It wouldn’t be a multi-room audio setup with out multiple clients! So on to the indoor systems. These are the running on my two Libreelec systems, connected to the TVs. The first of these is the most interesting since that connects to to our Polk Signa S2 soundbar. I’m actually planning a review of this in the near future, but for now we’ll just say it sounds awesome. I didn’t include it in the hardware list above since I didn’t purchase it just for this project.
I connected to the soundbar using the second USB soundcard and audio cable. This means I can play audio without having the TV on, just by setting the soundbar to it’s AUX input. The other system in the master bedroom, just sends audio via the HDMI port to the TV.
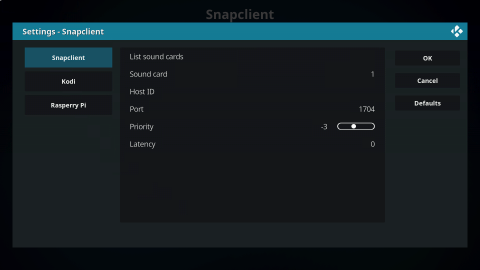
On the software side of these I used the excellent Libreelec Snapclient plug-in. Just install it from the official Libreelec repo and you’re good to go. In order for the auto-discovery to work, you should make sure that the Snapserver and Libreelec machine are on the same network. The only other issue I had is that sometimes the ‘list sound cards’ dialog in the plugin settings wouldn’t work. I found it easier to just list the devices on the command line with snapclient -l and put the relevant device number into the addon settings.
Conclusion and Next Steps
Overall, this system is pretty great. It’s served us well for outdoor audio all through the summer and has become our primary way of listening to our music collection. There are a few rough edges, like the issues with album art on Android.
The main other point of complaint is the profusion of volume controls. This could be a separate rant altogether, since everything has it’s own volume control for some reason. For this system I just don’t touch the volume in Mopidy and use the individual channel controls in Snapcast. It looks like there is now a plugin to provide better integration here, but I haven’t tried it yet.
The next steps for this system will be to re-build the server side system as part of my ongoing migration to Docker+VMs. At this point I’d like to add a couple more groups to the Snapserver. One of these will be for audio streaming in over Bluetooth. This will allow for us to stream audio directly from our phones to any of the speakers in the house.
The second group will be for TTS notifications from Home Assistant. I know I can move channels between groups via HASS automations to decide where the audio goes. The main stumbling block on this at the moment is how to get the audio from the HASS server to the media server, which will be separate VMs. If anyone has any ideas here, please let me know!
That’s it for now. Thanks for reading!
Leave a Reply